7 Tips on How to Customize a Blank Plush Doll?

Time:2026-09-10 Author:Madeline
0%

Learning how to customize a blank plush doll begins with more than choosing fabric and thread. It requires careful design, safe materials, and a clear understanding of the intended user. Grand View Research reports continued growth in the global stuffed toys market, supported by personalization, gift demand, and character-based products. Circana’s toy industry reporting also shows that plush remains a resilient category, especially when products offer emotional or interactive value. The numbers are encouraging, but they do not guarantee success.

Build-A-Bear founder Maxine Clark has often expressed the idea, “It’s not about the bear; it’s about the experience.” That principle fits custom plush design closely. A plain doll becomes meaningful through its texture, facial details, clothing, colors, and story. Small choices matter. A soft embroidered smile may feel warmer than a plastic accessory. A removable jacket can create more play possibilities. However, customization should not become visual clutter.

This guide explains how to customize a blank plush doll through seven practical steps. It covers planning, fabric selection, stitching, stuffing, clothing, decoration, and quality checks. The process is hands-on. Measure twice. Sew slowly. Mistakes happen. Some may even improve the design, although that is not always true. Product safety should remain central, particularly for children’s dolls. Avoid loose parts, sharp components, toxic finishes, and poorly secured decorations. Test seams, inspect every attachment, and consider age-appropriate construction before presenting the finished plush doll.
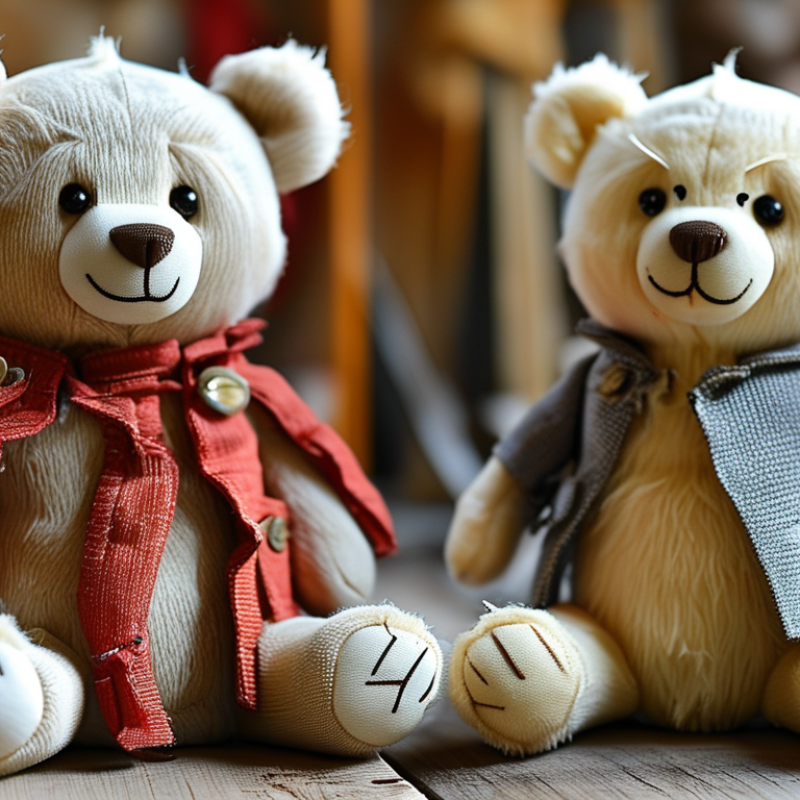
7 Tips on How to Customize a Blank Plush Doll?

Choosing a Plush Doll Design and Gathering Materials

Choosing a Plush Doll Design and Gathering Materials

When I customize a blank plush doll, I begin with the owner’s purpose. Is it a bedtime companion, a display piece, or a handmade gift? The answer guides the size, shape, colors, and fabric. Sketch three simple versions before cutting anything. One design may look charming on paper but feel awkward in your hands. That happened to me once.

Choose a clear silhouette with gentle curves and balanced proportions. Small details can create personality, such as floppy ears, embroidered freckles, or a contrast-colored belly. Avoid adding too many decorations. They can make sewing difficult and reduce the doll’s softness. Measure the blank doll carefully, then record its height, width, and seam positions. A paper template helps prevent wasted fabric.

Gather washable plush fabric, strong thread, fabric scissors, stuffing, pins, and an embroidery needle. Select short-pile fabric for tiny facial details and longer pile for soft outer sections. Use firmly secured embroidery instead of loose plastic parts, especially for young children. Test every fabric on a small hidden area. Some materials shed, stretch, or change texture after washing. I also recommend making one sample seam before the final design. It may reveal uneven tension or a color combination that feels less appealing than expected. Clean tools and steady stitching improve both appearance and durability.

Preparing the Blank Plush Doll for Customization

Preparing a blank plush doll carefully makes customization cleaner and more predictable. I usually inspect every seam, limb, and facial area before touching the fabric. Look for loose threads, uneven stuffing, or weak stitching. A gentle surface wash can remove dust and manufacturing residue. Let the doll dry completely, even inside the stuffing. Moisture can affect paint, glue, and fabric texture. Do not rush this part.

Tip: Photograph the doll before customizing it. These images help record its original shape and details.

Remove detachable accessories and brush away lint with a soft, dry brush. Avoid harsh cleaners, since they may fade the fabric or leave a slippery coating. Mark your design lightly with a washable fabric pencil. Keep the doll supported while measuring, especially around curved areas. I once skipped this step, and the face design looked slightly tilted. It was fixable, but frustrating.

Tip: Test every paint, dye, or adhesive on a hidden fabric area. Wait until it dries fully. Colors can darken.

Prepare clean tools before starting. Use separate brushes for light and dark colors. Cover your work surface and keep small parts away from children and pets. Choose materials labeled for fabric use, and follow their instructions carefully. I prefer adding color in thin layers. Heavy coats may stiffen the plush surface and hide its soft texture. Some planning still fails. That is normal. Adjust slowly, rather than forcing a perfect result.

Adding Colors, Patterns, and Facial Features

7 Tips on How to Customize a Blank Plush Doll?

Adding colors, patterns, and facial features can make a blank plush doll feel personal. Grand View Research valued the global stuffed and plush toys market at about USD 7.57 billion in 2023. Personalization is becoming more relevant as shoppers seek creative, meaningful products. Tip 1: Sketch the color plan before touching the fabric. Tip 2: Choose two or three main colors. Too many can look noisy.

Use fabric paint or tightly stitched appliqués made for textiles. Test every material on a hidden area first. Some colors bleed after washing. That small surprise can ruin a careful design. Tip 3: Apply thin paint layers, allowing each layer to dry. Tip 4: Repeat one pattern on the ears, paws, or belly. Small stars, checks, or soft waves add rhythm without overwhelming the doll.

Facial features need extra precision. Place the eyes with removable pins before sewing. Check their height from several angles. Tip 5: Keep the eyes balanced, but accept slight handmade variation. Tip 6: Use secure embroidery for noses and mouths, especially for children’s products. Safety guidance from ASTM F963 emphasizes secure components and material safety in toys. Tip 7: Inspect seams, loose threads, and color transfer after customization. A stitched smile may look uneven. That is not always a flaw. It can show genuine craft, but weak stitching requires correction.

7 Tips on How to Customize a Blank Plush Doll

Suggested visual allocation for balancing colors, patterns, and facial features in a cohesive plush-doll design.

Use the largest visual area for the main body color, then add smaller pattern and facial-feature areas to create contrast without overwhelming the doll.

Attaching Clothing, Accessories, and Decorative Details

Customizing a blank plush doll becomes easier when clothing and decorations are planned before stitching. Measure the doll’s body, then sketch each garment on paper. Leave extra fabric near seams. Plush surfaces can hide small errors, but tight clothing may distort the shape.

Choose soft, washable fabric for shirts, capes, or tiny skirts. Use small stitches and secure thread ends inside the garment. A simple opening at the back makes dressing easier. My first pocket sat crooked. I kept it. It gave the doll character, though I would measure twice next time.

For removable clothes, add fabric ties, snaps, or gentle hook-and-loop fasteners. Check every attachment by pulling lightly.

Accessories need balance. Sew ears, bows, scarves, and fabric bags firmly to prevent loose parts. Avoid sharp wire near children, and keep small pieces away from young users. For decorative details, try embroidery, felt shapes, fabric paint, or carefully stitched patches. Test paint on scrap fabric first. It may dry darker than expected. Place decorations where they do not block the doll’s eyes or make it difficult to hold. A few uneven stitches can look charming, but weak stitching will not last. Inspect the finished doll, especially around clothing edges and accessories. Adjust anything that feels loose, scratchy, or uncomfortable.

Finishing, Inspecting, and Caring for the Customized Doll

Tip: Finish the customized plush doll with careful trimming and secure stitching. Remove loose threads around the ears, paws, and facial details. Use small, even stitches when closing the final opening. The seam may look slightly uneven. That is acceptable if it remains strong and comfortable. Avoid hard points, exposed wires, or rough decorations that could scratch the skin.

Tip: Inspect the doll under bright, natural light. Gently pull each embroidered feature and check the seams. Press the stuffing from different sides. It should feel evenly distributed, without sharp lumps or empty corners. I once missed a tiny opening beneath an arm, so I now inspect hidden areas twice. Check that eyes, buttons, and other attached parts cannot loosen easily. Record the inspection date for reliable quality tracking.

Tip: Care instructions should match the materials used. Spot-clean delicate surfaces with a damp cloth and mild soap. Do not soak the doll unless its fabric and filling are washable. Air-dry it completely, away from strong heat. Damp stuffing can develop an unpleasant smell. Brush the fur gently after drying. Store the doll in a clean, dry place, and avoid heavy objects pressing against its shape. Recheck it after regular use, because small repairs are easier before seams widen.

FAQS

: How should I choose a plush doll design?

: Decide its purpose first: bedtime comfort, display, or a handmade gift. Sketch three versions before cutting fabric. One may feel awkward later.

What shape works best for a customized plush doll?

Choose a clear silhouette with gentle curves and balanced proportions. Floppy ears, embroidered freckles, or a contrasting belly add character. Avoid crowded decorations.

Which materials do I need?

Gather washable plush fabric, strong thread, fabric scissors, stuffing, pins, and an embroidery needle. Use short-pile fabric for small details. Use longer pile for soft outer areas.

How can I prevent fabric waste?

Measure the doll’s height, width, and seam positions. Record every measurement. Make a paper template before cutting the final fabric.

How should I select colors and patterns?

Plan the colors on paper first. Choose two or three main colors. Repeat one small pattern on the ears, paws, or belly.

How can I make the facial features look balanced?

Place the eyes with removable pins before sewing. Check their height from the front, side, and top. Slight variation can feel handmade.

What is the safest way to add facial details?

Use tightly secured embroidery for eyes, noses, and mouths. Avoid loose small parts, especially for young children. Inspect every thread carefully.

How can I test materials before finishing the doll?

Test paint, fabric, and thread on a hidden area. Wash the sample when possible. Colors may bleed, fabrics may stretch, and textures may change.

What should I inspect after customization?

Check seams, loose threads, color transfer, and uneven stuffing. Sew weak areas again. A slightly uneven smile may show craft, but poor stitching needs correction.

Conclusion

Learning how to customize a blank plush doll begins with choosing a clear design and gathering suitable materials, such as fabric-safe colors, soft felt, thread, needles, stuffing, and decorative items. First, prepare the doll by cleaning its surface, checking the seams, and planning where each detail will go. Then add colors, patterns, and facial features carefully, using gentle techniques that preserve the plush texture. Simple sketches or paper templates can help keep the design balanced and consistent.

Next, attach clothing, accessories, and other decorative details securely, making sure they are comfortable and do not damage the doll. After finishing, inspect every seam, stitch, and painted area, and correct any loose or uneven parts. The final tip is to care for the customized doll properly by keeping it away from excessive moisture, heat, and rough handling. With patience, creativity, and careful finishing, a plain plush doll can become a unique handmade keepsake that reflects a personal style.

Madeline

Madeline

Madeline is a dedicated marketing professional with a wealth of expertise in our company's core offerings. With a keen understanding of the industry, she brings a unique perspective to her role, consistently delivering high-quality content that highlights the superior aspects of our products. As......